Showing posts with label admin tools. Show all posts

Saturday, May 23, 2009

How to enable log rotation on Linux ?

logrotate is a program which will automatically backup your old log files and gzip them. You can specifiy how often logrotate should backup your logfiles and how long it should keep them. The advantage of logrotation is that you can save disk space without the deletion of log files. The logrotation can be configured for automatic rotation, compression, removal, and mailing of log files.

The default configuration file is /etc/logrotate.conf

# see "man logrotate" for details
# rotate log files weekly
weekly

# keep 4 weeks worth of backlogs
rotate 4

# create new (empty) log files after rotating old ones
create

# uncomment this if you want your log files compressed
#compress

# RPM packages drop log rotation information into this directory
include /etc/logrotate.d

# no packages own wtmp -- we'll rotate them here
/var/log/wtmp {
monthly
minsize 1M
create 0664 root utmp
rotate 1
}

# system-specific logs may be also be configured here.

Service or server specific configurations stored in /etc/logrotate.d directory, for example here is sample apache logrotate configuration file:
less /etc/logrotate.d/httpd

/var/log/httpd/*log {
monthly
rotate 52
compress
missingok
notifempty
sharedscripts
postrotate
/sbin/service httpd reload > /dev/null 2>/dev/null || true
endscript
}
Now you need to set a cronjob for the logrotation to run. crontab -e

00 00 * * * /usr/sbin/logrotate -s /home/humanlinux/config/logrotate.status

Cron ensures that the command runs at midnight everyday. The command has three parts. /usr/sbin/logrotate is the path to logrotate. The -s /home/humanlinux/config/logrotate.status option specifies where logrotate keeps its status information. This file has to be writeable by the user running the cron.


run the command /usr/sbin/logrotate -f /etc/logrotate.conf to begin the log rotation

Thanks & Regards
tell2humanlinux@gmail.com


Thursday, May 14, 2009

How to reset the lxadmin password?

What if the password of lxadmin is lost? 

We can reset the lxadmin password using the following commands.
Login to the server using ssh

1)  cd /usr/local/lxlabs/lxadmin/httpdocs 

2) /usr/bin/lphp.exe ../bin/common/resetpassword.php master

3)  type your new password.

4) After that login to lxadmin at https://xx.xx.xx.xx:7777/ (xx.xx.xx.xx is your server IP address) using username : admin and password :  your new password.

thanks & regards
tell2humanlinux@gmail.com

How to put the grub password in linux!

In Linux anyone can reset the root password from single usermode . So it is considered as a security fault if the machine is public. There comes the importance of putting the grub password, so that only admin is allowed to login if the machine is rebooted.

Here are the steps to put the grub password.

1) open the command prompt and type the following commands

2) grub

3) md5crypt

4) type the password

5) copy the encrypted password generated

6) Ctrl c

7) vi /boot/grub/grub.conf

8) paste the following line just above the 'title'

password --md5 "encrypted password here"

9) save and quit. Done.

I have give the sample grub file here.

======================================

#boot=/dev/hdb
default=0
timeout=15
splashimage=(hd1,8)/boot/grub/splash.xpm.gz
hiddenmenu
password --md5 %&mkj89(*$*J)$OO*=*

title CentOS (2.6.18-92.el5)
root (hd1,8)
kernel /boot/vmlinuz-2.6.18-92.el5 ro root=LABEL=/ rhgb quiet
initrd /boot/initrd-2.6.18-92.el5.img

======================================


thanks & regards
tell2humanlinux@gmail.com

Tuesday, May 5, 2009

how to install csf in ubuntu / linux servers!

CSF instllation in ubuntu / linux servers!

CSF is a firewall that can be installed on linux based severs to enhance the security. It can be installed even on a server based on cPanel. It can be configured to find out hacking attempts through ssh etc. Can be used for ip whitelisting and blacklisting.

The csf instllation is quite easy. Just follow the documentation I have given below.

1)Create a folder 'csf'

mkdir csf
cd csf


2)Download the csf into this directory and instal.

wget http://www.configserver.com/free/csf.tgz
tar -xzf csf.tgz
cd csf
sh install.sh

3)Now we need to test whether we have the required iptables modules in the system

perl /etc/csf/csftest.pl

you may get a result like this
======================================================================================
root@humanlinux-desktop:/home/hlinux/Downloads/csf/csf# perl /etc/csf/csftest.pl
Testing ip_tables/iptable_filter...OK
Testing ipt_LOG...OK
Testing ipt_multiport/xt_multiport...OK
Testing ipt_REJECT...OK
Testing ipt_state/xt_state...OK
Testing ipt_limit/xt_limit...OK
Testing ipt_recent...OK
Testing ipt_owner...OK
Testing iptable_nat/ipt_REDIRECT...OK

RESULT: csf should function on this server
=======================================================================================


Don't worry if you cannot run all the features, so long as the script doesn't
report any FATAL errors

4)You should not run any other iptables firewall configuration script. For
example, if you previously used APF+BFD you can remove the combination (which
you will need to do if you have them installed otherwise they will conflict
horribly):

sh /etc/csf/remove_apf_bfd.sh

5)That's it. You can then configure csf and lfd by edit the files
directly in /etc/csf/*, or on cPanel servers use the WHM UI

csf installation for cPanel is preconfigured to work on a cPanel server with all
the standard cPanel ports open.

csf installation for DirectAdmin is preconfigured to work on a DirectAdmin
server with all the standard DirectAdmin ports open.

csf auto-configures your SSH port on installation where it's running on a non-
standard port.

csf auto-whitelists your connected IP address where possible on installation.

You should ensure that kernel logging daemon (klogd) is enabled. Typically, VPS
servers have this disabled and you should check /etc/init.d/syslog and make
sure that any klogd lines are not commented out. If you change the file,
remember to restart syslog.

See the readme.txt file for more information.

Webmin Module Installation/Upgrade:-

To install or upgrade the csf webmin module:

Install csf as above
Install the csf webmin module in:
Webmin > Webmin Configuration > Webmin Modules >
From local file > /etc/csf/csfwebmin.tgz > Install Module


Uninstallation of CSF :( :-

Removing csf and lfd is even more simple:

On cPanel servers:

cd /etc/csf
sh uninstall.sh

On DirectAdmin servers:

cd /etc/csf
sh uninstall.directadmin.sh

On generic linux servers:

cd /etc/csf
sh uninstall.generic.sh


un-installation Completed

ref: http://www.configserver.com/free/csf/install.txt


thanks & regards
tell2humanlinux@gmail.com


Thursday, April 30, 2009

How to monitor a system remotely using conky?


How to monitor a linux machine remotely using conky or just an "easy way"!

Here are the steps to remotely monitor a linux machine using conky. The example here is done on an Ubuntu Box.

1)Install conky on the system(remote server/system) you need to monitor

sudo apt-get install conky

2)Then install the "xauth" program onto the system(remote server/system) tunneling X (file server)

sudo apt-get install xauth

3)Then we have to edit the ssh server side file /etc/ssh/sshd_config and make sure "X11Forwarding yes" is enabled

4)Then from your local system , you can log into the remote system via SSH with the -X flag. Example:

ssh -X username@192.168.1.100

the user name should be the user of the (remote server/system)

5)once you are logged-in to the remote system, just type conky on the command prompt. You will be able to see the services like:-

  • uptime
  • frequency
  • RAM usage
  • SWAP usage
  • CPU usage
  • Processes
  • File systems:
  • Networking:
  • and currently running processes of the remote system
All in GUI on your local system. Happy Monitoring :)


thanks & regards
tell2humanlinux@gmail.com

Sunday, April 26, 2009

How to install AIDE?

What is AIDE:-

AIDE (Advanced Intrusion Detection Environment) is an intrusion detection program. It is a free replacement for Tripwire.It can find out any changes made on the system binaries, libraries, header files , and configuration files etc by "comparing" regularly with the database of these files which was made at the time of its instllation.

How Does AIDE works:-

Once AIDE is installed, It creates a database of the files specified in AIDE’s configuration file. The AIDE database stores various file attributes like permissions, inode number, user, group, file size, mtime and ctime, atime, growing size, number of links and link name. AIDE also creates a cryptographic checksum or hash of each file using message digest algorithms like sha, md5, rmd160, tiger etc. Also acl, xattr and selinux can be used if enabled during compile time.This databse is created before the server/system is bought into the network.The AIDE should be installed to the system before it is exposed to the internet.

So Initially the administrator need to create an AIDE database on a new server before it is setup for networking eg hosting.This AIDE database is an excat summary of the Linux system before it is bought into the network.This database(db) will hold information about system binaries, libraries, header files etc that are expected to remain the same throughout.Suppose someone has broken-into the system, though it is easier to manipulate file dates, sizes etc, it will be quite difficult for him to manipulate cryptographic checksum like md5. Thus by rerunning AIDE after a break-in, the administrator can quickly identify changes to files with high degree of accuracy.

How to Install AIDE in UBUNTU?

1)You need the root access to install AIDE:- sudo su -

2)Install These prerequisites (packages) for AIDE:

GCC compiler for C : apt-get install gcc byacc
GNU Flex : apt-get install flex
GNU Bison : apt-get install bison
GNU Make : apt-get install make
Mhash library : apt-get install libmhash2 libmhash-dev
PostgreSQL Development Library : apt-get install postgresql-server-dev-8.3

Some of the above packages maybe already installed on your box, in that case when you execute the above commands it shows " 0 upgraded".so need not worry about that packages.

Or else you can check manually whether the packages are installed or not by using the follawing command: dpkg –get-selections | grep gcc

If the result is : gcc-4.3  install
then gcc is installed otherwise if you get no output ,then it means that gcc is not installed.

3)Once all the packages are installed then download aide from here . The downloaded packaege will be zipped in tar.

4)Create a folder 'downloades' and extract the tar achieve into this folder using the command: tar -xzvf aide-x.xx.x.tar.gz (replace x with version number)
Now you wil get the folder aide-x.xx.x
goto that folder by: cd aide-x.xx.x
Then execute the following commands :

./configure
make
make install
make clean

5)NOw you need to open the aide configuration file and determine the location where the aide database is stored. Go to that location

6)To initialise the database perform:
aide -i
mv aide.db.new aide.db

7)Now we can check wether the AIDE works by using the following command:-
 aide

8)Configuration of AIDE
AIDE has its config file located inside (if installed via package management software like synaptic, config file is /etc/aide/aide.conf) /usr/local/etc/aide.conf .
And it’s default executable is located inside /usr/local/bin/aide.

9)Explanation of the aide.conf file
database=file:/var/lib/aide/aide.db
location of the database to be read (This is the database taken as benchmark)
database_new=file:/var/lib/aide/aide.db.comp
location of the database for –compare is read (This is not present by default and is used only when we have to compare two distinct databases.)
database_out=file:/var/lib/aide/aide.db.new
location of the database to be written

10)Useful Commands
aide -C : Performs a check on the filesystem ? (also same as: aide)
aide -i : Initialises or creates the benchmark database supplied by database_out directive (here it is aide.db.new)
aide -u -c /etc/aide.conf : update the database and use the specified config file

11)Usage
Before putting one’s server into the network, the admin will have to save a secure configuration of the system by:

aide -i
mv aide.db.new aide.db

The second command transfers the server’s earlier state(aide.db database) with the new one(aide.db.new). So be careful when you do this. It is advisable to keep a backup of the earlier database.
Next time in-order to check for any break-in perform
aide 
or
aide -C
To compare the current database with some earlier backed-up database, give the path of the backed-up database to database_new option in aide.conf and perform:
aide –compare
The task of saving the old database and comparing with a new one has to be done periodically (preferably daily with the help of a cron task).


Reference Links
http://www.cs.tut.fi/~rammer/aide.html
http://supportsages.com/blog

thanks & regards
tell2humanlinux@gmail.com


Wednesday, April 22, 2009

Antivirus For Linux!


These days I was dealing with some security related packages. I had gone through the changes to be made on IPTABLE to enhance the firewall, and a little bit about SELinux.I came to know about ClamAV, an anti-virus package for Linux..

Clam AntiVirus (ClamAV) is a free, cross-platform antivirus software tool-kit. One of its main uses is on mail servers as a server-side email virus scanner. The application was developed for Unix and has third party versions available for AIX, BSD, HP-UX, Linux, Mac OS X, OpenVMS, OSF and Solaris.


ClamAv has the following features!

  1. a command line scanner
  2. automatic database updater
  3. scalable multi-threaded daemon
  4. running on an anti-virus engine from a shared library
  5. a Milter interface for sendmail
  6. on-demand scanning
  7. supports many document formats, including Microsoft Office, HTML, Rich Text Format and Portable Document Format.
  8. It also support for Zip, RAR, Tar, Gzip, Bzip2, OLE2, Cabinet, CHM, BinHex, SIS formats, most mail file formats, ELF executables and Portable Executable files compressed with UPX, FSG, Petite, NsPack, wwpack32, MEW, Upack and obfuscated with SUE, Y0da Cryptor.

The ClamAV virus database is updated several times each day and as of 25 December 2008 contained 479,371 virus signatures.

Latest Stable Release:

Latest ClamAV® stable release is: 0.95.1
Total number of signatures: 545288
ClamAV Virus Databases:
main.cvd ver. 50 released on 15 Feb 2009 16:47 :0500
daily.cvd ver. 9274 released on 22 Apr 2009 13:17 :0400 (on 04/23/09)

Download the production quality stable release here

Download the latest virus database:

main.cvd ver. 50 released on 15 Feb 2009 16:47 :0500
daily.cvd ver. 9274 released on 22 Apr 2009 13:17 :0400

How to install clamAV in Debain ?

The Debian packages are maintained by Stephen Gran. ClamAV has been officially included in the Debian distribution starting from the sarge release. Run apt-cache search clamav to find the name of the packages available for installation.

You can also use one of the Debian volatile repositories to keep your ClamAV installation updated on your system.

Always choose the mirror near to you.
Edit /etc/apt/sources.list and add a line like this to it:

stable/etch:

deb http://volatile.debian.org/debian-volatile etch/volatile main contrib non-free

Then run apt-get update and apt-get install clamav
If you need clamd, you may also want to run apt-get install clamav-daemon

How to install clamAV in Ubuntu?

The Ubuntu packages are maintained by Ubuntu MOTU Developers. ClamAV has been officially included in the Ubuntu distribution since the first Ubuntu release. Run apt-cache search clamav to find the name of the packages available for installation.


The released set (release, *-updates, and *-security) are patched for security updates. Following extensive testing of clamav and the packages that use it in the backports repository, they may be updated to a newer version. These are official Ubuntu packages and supported by community developers.


The Ubuntu backports repository will contain the newest clamav version that has been at least lightly tested to work with that version. These packages can be installed by enabling the backports repository in your system. These are official Ubuntu packages and supported by community developers.


How to install calmAV in Redhat/Fedora ?

Two very good repositories are maintained by Dag Wieers dag at wieers*com:

http://packages.sw.be/clamav/

and Oliver Falk:

SRPMS: http://filelister.linux-kernel.at/?current=/packages/SRPMS/
FC devel: http://rpms.linux-kernel.at/?current=/lkernAT/fedora/core/development/i386
FC 3: http://rpms.linux-kernel.at/?current=/lkernAT/fedora/core/3/i386
RedHat 8.0: http://rpms.linux-kernel.at/?current=/lkernAT/redhat/extras/8.0/i386


How to install clamAV in Mandriva ?

Official Mandriva packages for cooker and supported updates (2006.0 and newer) are maintained by Oden Erikkson. For updates, use the software package manager or urpmi:

urpmi.update—update

urpmi—update—auto clamd

Unofficial packages for current and several older Mandriva distributions are maintained by Bill Randle and are available from his web server.


How to install clamAV in SuSe ?

Official SuSe packages for clamAV are maintained by Reinhard Max.

You can get it from here .


Thanks & regards

tell2humanlinux@gmail.com

Saturday, April 18, 2009

nagios installation steps!


Nagios is a popular open source computer system and network monitoring software application. It watches hosts and services, alerting users when things go wrong and again when they get better.Nagios, originally created under the name NetSaint, was written and is currently maintained by Ethan Galstad, along with a group of developers actively maintaining both official and unofficial plugins.Nagios was originally designed to run under Linux, but also runs well on other Unix variants.Nagios is free software licensed under the terms of the GNU General Public License version 2 as published by the Free Software Foundation.

Download nagios 3.1.0(latest)

As a newbie i decided to install the nagios in my ubuntu 9.04 to monitor my own system services & i succedeed in it. The nagios documentation was pretty simple to follow. But i have written a documentation of my own. This documentaion is for those who are lazy(like me :)) to read whole crap given in the official documentaion.Here i just posted the step by step instllation.

N.B: This is the documentaion for Ubuntu. If need to install on other distros goahead and follow this Documentation.
And use sudo in appropriate places.

Lets begin:

1)Nagios need Apache & gdlibrary to work.

sudo apt-get install apache2 (will install apache 2)

sudo apt-get install build-essential

sudo apt-get install libgd2-xpm

2)Create an Account for nagios

sudo useradd -m nagios ( -m is used to create home if donot exist)

passwd nagios

If you are using server edition do the next step , else skip it and goto a).

/usr/sbin/groupadd nagios
/usr/sbin/usermod -G nagios nagios

a)Create a new nagcmd group for allowing external commands to be submitted through web interfacw. Add both nagios & Apache user to the group.

/usr/sbin/groupadd nagcmd

/usr/sbin/usermod -a -G nagcmd nagios

/usr/sbin/usermod -a -G nagcmd www-data


3)Download nagios & Plugins

mkdir ~/downloads
cd ~/downloads

download the nagios & plugins in this folder(downloads). Extract the package.

wget -c http://osdn.dl.sourceforge.net/sourceforge/nagios/nagios-3.0.6.tar.gz

wget http://osdn.dl.sourceforge.net/sourceforge/nagiosplug/nagios-plugins-1.4.11.tar.gz

Extract the packages:

tar xzf nagios-3.0.6.tar.gz

cd nagios-3.0.6

Run the Nagios configure script, passing the name of the group you created earlier like so:

./configure --with-command-group=nagcmd

Compile the Nagios source code.

make all
make install
make install-init
make install-config
make install-commandmode

4)Don't start Nagios yet, we have to do some more.

Edit the /usr/local/nagios/etc/objects/contacts.cfg config file with your favorite editor and change the email address associated with the nagiosadmin contact definition to the address you'd like to use for receiving alerts.

vi /usr/local/nagios/etc/objects/contacts.cfg

just change the email address you need to receive the alerts.

5)Configure the webinterface.

dont leave the current directory ( ~/downloads/nagios-3.0.6)

make install-webconf

Create a nagiosadmin account for logging into the Nagios web interface. Remember the password you assign to this account - you'll need it later.

htpasswd -c /usr/local/nagios/etc/htpasswd.users nagiosadmin

Restart Apache to make the new settings take effect.

sudo /etc/init.d/apache2 reload (restart)

6)Compile and install nagios plugin

Extract the Nagios plugins..

cd ~/downloads
tar xzf nagios-plugins-1.4.11.tar.gz
cd nagios-plugins-1.4.11
Compile and install the plugins.

./configure --with-nagios-user=nagios --with-nagios-group=nagios
make
make install

7)login to your web interface(Browser)

You should now be able to access the Nagios web interface at the URL below. You'll be prompted for the username (nagiosadmin) and password you specified earlier.

http://localhost/nagios/

type the nagiosadmin username & password

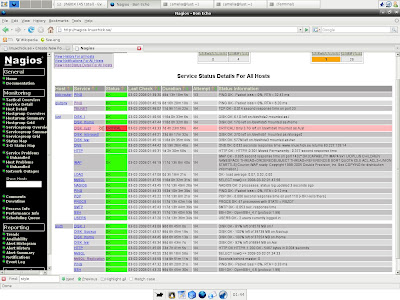
Click on the "Service Detail" navbar link to see details of what's being monitored on your local machine. It will take a few minutes for Nagios to check all the services associated with your machine, as the checks are spread out over time

DONE! :)

For detailed instllation documentation refer: here

thanks & regards
tell2humanlinux@gmail.com

Tuesday, April 14, 2009

How to put .htpasswd protection for a web directory!

Protecting content on the web is something that most savvy users will have to do at one point or another. Whether the content is personal or professional, there comes a time when that content must only be seen by "authorized" eyes. The Apache web server ( that daemon that serves up your marvelous content ) allows a user to configure two files to facilitate this very purpose. Those files are .htaccess and .htpasswd.

.htaccess
The .htaccess file is a simple text file placed in the directory you want the contents of the file to affect. The rules and configuration directives in the .htaccess file will be enforced on whatever directory it is in and all sub-directories as well. In order to password protect content, there are a few directives we must become familiar with. One of these directives in the .htaccess file ( the AuthUserFile directive ) tells the Apache web server where to look to find the username/password pairs.
.htpasswd
The .htpasswd file is the second part of the affair. The .htpasswd file is also a simple text file. Instead of directives, the .htpasswd file contains username/password pairs. The password will be stored in encrypted form and the username will be in plaintext.
Apache Server
We have to make some changes on the apache conf file, & rester the service.The procedure is explained below.

Creating an .htaccess file:-
goto the directory you need to password protect. create a file named .htaccess.
add the following lines into it.

AuthName "Hello user!"
AuthType Basic
AuthUserFile /usr/local/humanlinux/.htpasswd (this is the location of the .htpasswd, you have to specify accourdingly)
Require user john (replace the john with desired username)

Save the file.


Creating an .htpasswd file:-


To create a .htpasswd file in /usr/local/humanlinux

htpasswd -c /usr/local/humanlinux/.htpasswd john

Note the '-c' is only used when creating a new .htpasswd file.

To add dave to an existing .htpasswd file located in /usr/local/humanlinux/ the following command will be used.

htpasswd /usr/local/humanlinux/.htpasswd dave

Sample .htpasswd File

Below is a sample .htpasswd file that contains users john and dave

john:n5MfEoHOIQkKg
dave:9fluR/1n73p4c


Changes in the apache conf file:-

open the httpd.conf file using your favourote editor.goto the diretory area.


AllowOverride All


you have to specify the correct path for the directory you need to pasword protect.Here i have protected the directory /home/humanlinux/public_html/protected.

Restart the apache service.


Troubleshooting

  • Make sure that the path specified in AuthUserFile is the correct full path. This is a major cause of problems. If Apache cannot find the .htpasswd file, then all attempts will fail.
  • Make sure the permissions on the .htaccess and .htpasswd files are set so that Apache can read them.
    • chmod 0644 .htaccess
    • chmod 0644 .htpasswd
  • Other issues may be out of your control. Web administrators can lock down Apache so that it ignores all .htaccess files it encounters. This can be achieved with an AllowOverride None directive and option on the ServerRoot/DocumentRoot directories. If this is the case (.htaccess not allowed) you will have to kindly ask your web administrator to allow .htaccess files with authorization directives in your personal web directory. This can be achieved with AllowOverride AuthConfig directive and option.
tell2humanlinux@gmail.com