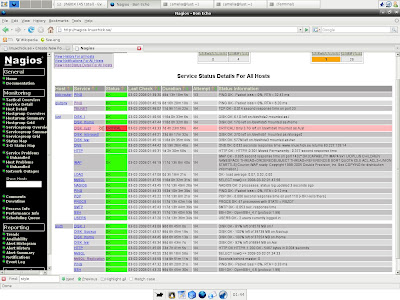
Nagios is a popular open source computer system and network monitoring software application. It watches hosts and services, alerting users when things go wrong and again when they get better.Nagios, originally created under the name NetSaint, was written and is currently maintained by Ethan Galstad, along with a group of developers actively maintaining both official and unofficial plugins.Nagios was originally designed to run under Linux, but also runs well on other Unix variants.Nagios is free software licensed under the terms of the GNU General Public License version 2 as published by the Free Software Foundation.
Download nagios 3.1.0(latest)
As a newbie i decided to install the nagios in my ubuntu 9.04 to monitor my own system services & i succedeed in it. The nagios documentation was pretty simple to follow. But i have written a documentation of my own. This documentaion is for those who are lazy(like me :)) to read whole crap given in the official documentaion.Here i just posted the step by step instllation.
N.B: This is the documentaion for Ubuntu. If need to install on other distros goahead and follow this Documentation.
And use sudo in appropriate places.
Lets begin:
1)Nagios need Apache & gdlibrary to work.
sudo apt-get install apache2 (will install apache 2)
sudo apt-get install build-essential
sudo apt-get install libgd2-xpm
2)Create an Account for nagios
sudo useradd -m nagios ( -m is used to create home if donot exist)
passwd nagios
If you are using server edition do the next step , else skip it and goto a).
/usr/sbin/groupadd nagios
/usr/sbin/usermod -G nagios nagios
a)Create a new nagcmd group for allowing external commands to be submitted through web interfacw. Add both nagios & Apache user to the group.
/usr/sbin/groupadd nagcmd
/usr/sbin/usermod -a -G nagcmd nagios
/usr/sbin/usermod -a -G nagcmd www-data
3)Download nagios & Plugins
mkdir ~/downloads
cd ~/downloads
download the nagios & plugins in this folder(downloads). Extract the package.
wget -c http://osdn.dl.sourceforge.net/sourceforge/nagios/nagios-3.0.6.tar.gz
wget http://osdn.dl.sourceforge.net/sourceforge/nagiosplug/nagios-plugins-1.4.11.tar.gz
Extract the packages:
tar xzf nagios-3.0.6.tar.gz
cd nagios-3.0.6
Run the Nagios configure script, passing the name of the group you created earlier like so:
./configure --with-command-group=nagcmd
Compile the Nagios source code.
make all
make install
make install-init
make install-config
make install-commandmode
4)Don't start Nagios yet, we have to do some more.
Edit the /usr/local/nagios/etc/objects/contacts.cfg config file with your favorite editor and change the email address associated with the nagiosadmin contact definition to the address you'd like to use for receiving alerts.
vi /usr/local/nagios/etc/objects/contacts.cfg
just change the email address you need to receive the alerts.
5)Configure the webinterface.
dont leave the current directory ( ~/downloads/nagios-3.0.6)
make install-webconf
Create a nagiosadmin account for logging into the Nagios web interface. Remember the password you assign to this account - you'll need it later.
htpasswd -c /usr/local/nagios/etc/htpasswd.users nagiosadmin
Restart Apache to make the new settings take effect.
sudo /etc/init.d/apache2 reload (restart)
6)Compile and install nagios plugin
Extract the Nagios plugins..
cd ~/downloads
tar xzf nagios-plugins-1.4.11.tar.gz
cd nagios-plugins-1.4.11
Compile and install the plugins.
./configure --with-nagios-user=nagios --with-nagios-group=nagios
make
make install
7)login to your web interface(Browser)
You should now be able to access the Nagios web interface at the URL below. You'll be prompted for the username (nagiosadmin) and password you specified earlier.
http://localhost/nagios/
type the nagiosadmin username & password
Click on the "Service Detail" navbar link to see details of what's being monitored on your local machine. It will take a few minutes for Nagios to check all the services associated with your machine, as the checks are spread out over time
DONE! :)
For detailed instllation documentation refer: here
thanks & regards
tell2humanlinux@gmail.com


No comments:
Post a Comment